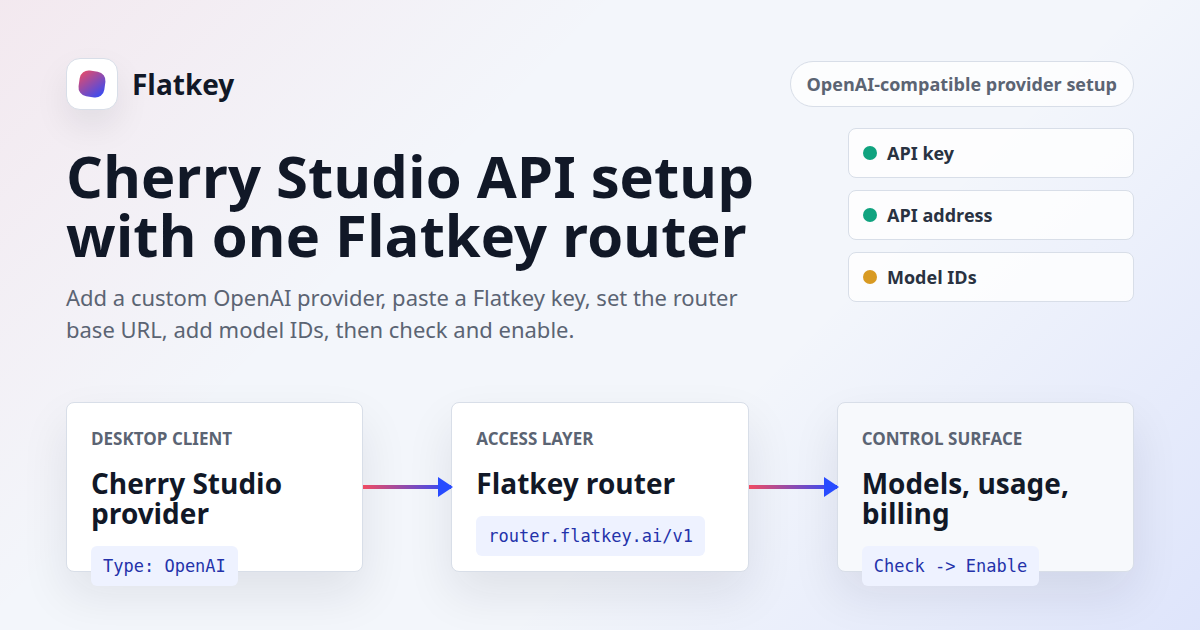
If you are searching for Cherry Studio API setup, you probably already know which model router you want to use. The remaining job is practical: add a provider in Cherry Studio, paste the right API key, set the API address, add the model IDs you want, and confirm the provider is enabled.
Flatkey fits that workflow because it gives Cherry Studio users one OpenAI-compatible access layer for supported models. Instead of creating separate provider accounts for every model family, you can use one Flatkey API key, the Flatkey router base URL, and the Flatkey dashboard for usage, billing, model selection, and routing review.
This guide shows the Cherry Studio API setup through Flatkey as a text-only workflow. It follows Cherry Studio's current custom-provider documentation and avoids app screenshots because screenshots were not reviewer-confirmed for this publish.
Quick Answer: Cherry Studio API Settings For Flatkey
For a standard Cherry Studio API setup with Flatkey, add a custom provider and choose OpenAI as the provider type. Then enter your Flatkey API key, set the API address to Flatkey's OpenAI-compatible router base URL, add the model IDs you want to use, run the Cherry Studio check, and turn on the provider switch.
| Cherry Studio Field | Flatkey Value | What To Verify |
|---|---|---|
| Provider Name | Flatkey |
Any clear name is fine. Use a name your team will recognize later. |
| Provider Type | OpenAI |
Cherry Studio documents OpenAI as a supported custom-provider type. |
| API Key | Your Flatkey API key | Create or copy the key from the Flatkey dashboard. Do not publish it or paste it into shared docs. |
| API Address | https://router.flatkey.ai/v1 |
Use the OpenAI-compatible Flatkey base URL. Do not paste a full /chat/completions endpoint. |
| Models | Model IDs from Flatkey | Use the Flatkey pricing catalog or console as the source of truth before production use. |
| Check | Use Cherry Studio's check button | If the check fails, verify key, API address, model list, and provider enable state. |
If your Cherry Studio build explicitly asks for the root API address and automatically appends /v1/chat/completions, use https://router.flatkey.ai instead. Cherry Studio's own API Address documentation says the app may append the standard chat completions path for usual large language model routes, and also documents a # suffix for complete custom routes. For Flatkey, start with the published base URL, then use the check result to catch any address-format mismatch before sending real work.
Why Use Flatkey For Cherry Studio API Access
A Cherry Studio API setup is usually not only about getting one chat response. It is about keeping a desktop AI client connected to the models your team actually uses: GPT-style models, Gemini-compatible models, DeepSeek, Qwen, image models, and other supported routes.
Flatkey's public product surface is designed for that access pattern:
- One API key for connected AI models.
- One OpenAI-compatible base URL:
https://router.flatkey.ai/v1. - One dashboard for keys, usage, billing, and routing.
- A model catalog with current availability and pricing signals.
- Public tool context that names Cherry Studio as a supported app.
That makes the Cherry Studio API workflow cleaner for developers who want one desktop client and one model access layer, without turning each model test into a separate provider-account setup.
Before You Start
Before changing Cherry Studio settings, confirm these items:
- You can sign in to Flatkey and access the dashboard.
- You have created or can create a Flatkey API key.
- Your Flatkey account has balance or access for the models you want to test.
- You know at least one model ID from the Flatkey console or pricing catalog.
- You can open Cherry Studio settings and edit Model Services.
Do not use a production key for the first Cherry Studio API smoke test if your team has separate development and production credentials. Use a limited test key, verify the route, then decide how you want to manage keys for daily desktop use.
Step 1: Create Or Copy A Flatkey API Key
Open the Flatkey dashboard and create an API key for Cherry Studio. Name it clearly, such as cherry-studio-desktop, so later usage logs are easier to interpret.
If your team uses shared workstations or multiple developers, create separate keys rather than one shared secret. That makes the Cherry Studio API usage trail easier to review and safer to revoke if someone leaves the project.
Store the key in your password manager or team secret manager. You only need to paste it into Cherry Studio's API Key field once during setup.
Step 2: Add A Custom Provider In Cherry Studio
Cherry Studio's current Custom Provider documentation describes this path:
- Open Cherry Studio.
- Open Settings.
- Go to Model Services.
- Click + Add under the provider list.
- Set Provider Name to
Flatkey. - Set Provider Type to
OpenAI. - Click Add.
This creates the provider shell. It does not finish the Cherry Studio API setup until the API key, API address, model list, check, and enable switch are handled.
Step 3: Enter The Flatkey API Key And API Address
After adding the provider, select it in the provider list and fill in the main fields.
| Field | What To Enter | Common Mistake |
|---|---|---|
| API Key | Paste your Flatkey API key. | Using a provider key from OpenAI, Anthropic, Google, or another service instead of the Flatkey key. |
| API Address | Use https://router.flatkey.ai/v1 as the OpenAI-compatible base URL. |
Pasting https://router.flatkey.ai/v1/chat/completions as if Cherry Studio wanted the full endpoint. |
| Enable | Turn on the provider switch after the check succeeds. | Passing the check but leaving the provider disabled, which hides the models from the model list. |
Cherry Studio's API Address docs warn that full routes can behave differently from base addresses. For this Cherry Studio API workflow, the safe operating rule is simple: use Flatkey's base URL first, do not append the chat-completions endpoint yourself, and let the check tell you whether your Cherry Studio version expects a root address variant.
Step 4: Add Flatkey Model IDs
Cherry Studio can fetch or manage models from provider settings, but the model ID still matters. If the model is not added to the provider's model list, it may not appear later in Cherry Studio's model picker.
Use the Flatkey console or the pricing catalog as the current source for model IDs. A dated pricing API snapshot for this article returned OpenAI-compatible endpoint support across the Flatkey catalog, including model names such as deepseek-chat, gpt-4.1, qwen-max, and other OpenAI-compatible entries. Treat those examples as dated proof, not as a permanent recommendation list.
For the first Cherry Studio API smoke test, pick one model that your account can access and that is meant for chat. Add only that model first. After the check passes and you send a successful message, add the rest of your regular models.
Step 5: Run The Cherry Studio Check
Cherry Studio documents a check button next to the API Key input box. Use it before opening the chat interface. The check is useful because it catches the most common Cherry Studio API problems before they become confusing chat failures.
If the check succeeds:
- Confirm the provider switch is on.
- Confirm the model appears in the model list.
- Open a new Cherry Studio chat.
- Select the Flatkey provider and your chosen model.
- Send a small test prompt.
- Review the Flatkey dashboard for usage and cost visibility.
If the check fails, do not keep changing random fields. Work through the troubleshooting table below.
Troubleshooting Cherry Studio API Setup
| Problem | Likely Cause | Fix |
|---|---|---|
| Check fails immediately | Wrong key, expired key, no account access, or pasted whitespace. | Copy a fresh Flatkey key from the dashboard and paste it again. Do not include quotes or spaces. |
| Address error or 404 | The API Address has the wrong path shape. | Use https://router.flatkey.ai/v1. If your Cherry Studio build appends the whole /v1/chat/completions path, try https://router.flatkey.ai. |
| Model does not appear | The model was not added to the provider's model list. | Use Manage or + Add in Cherry Studio and add the exact model ID from Flatkey. |
| Check uses the wrong model | Cherry Studio may use the last added chat model during checking. | Remove unsupported test models and keep one known chat model for the first check. |
| Provider passed check but is missing in chat | The provider enable switch is still off. | Turn on the switch in the provider row after the check succeeds. |
| Usage is hard to explain later | Several people share one desktop key. | Create separate Flatkey keys by user, device, or environment so usage logs stay reviewable. |
Most Cherry Studio API issues come down to four fields: API key, API address, model ID, and enable state. Verify those before changing model settings or creating additional providers.
How This Differs From A Direct OpenAI Provider Setup
A direct OpenAI provider setup points Cherry Studio at one provider account. A Flatkey Cherry Studio API setup points Cherry Studio at a gateway that can route supported models through one key and one dashboard.
| Decision Area | Direct Provider Setup | Flatkey Setup |
|---|---|---|
| API key | Provider-specific key. | Flatkey key for supported models. |
| Base URL | Provider-specific API URL. | https://router.flatkey.ai/v1. |
| Model expansion | Add another provider account or key when needed. | Add supported model IDs from Flatkey. |
| Billing review | Review each provider separately. | Use Flatkey's dashboard and billing view. |
| Operational fit | Good for one provider. | Better when Cherry Studio is a desktop client for several model families. |
If you are already moving code or tools to a gateway pattern, read the OpenAI-compatible API migration guide after this setup. If your tool stack also includes Claude Code or CC Switch, the CC Switch and Claude Code Flatkey guide covers the adjacent tool configuration path.
Recommended Team Setup
For an individual test, one Flatkey key in Cherry Studio is enough. For a team, treat the Cherry Studio API setup as part of your model-access policy.
- Create separate keys for development, production-like tests, and personal desktop usage.
- Name keys after the tool and owner, such as
cherry-studio-leeorcherry-studio-eval. - Use the Flatkey dashboard to review usage after the first test.
- Set quota controls before inviting more desktop users.
- Document the approved model IDs so users do not add random unsupported models.
This keeps the convenience of Cherry Studio without losing visibility into who is using which model and how much each workflow costs.
FAQ
Does Cherry Studio support OpenAI-compatible APIs?
Yes. Cherry Studio's custom provider documentation lists OpenAI as a supported provider type, and its model-service settings cover API Key, API Address, model management, connectivity checks, and provider enable state. That is the configuration surface used for this Cherry Studio API setup.
What API address should I use for Flatkey in Cherry Studio?
Use https://router.flatkey.ai/v1 as the Flatkey OpenAI-compatible base URL. Do not paste the full /chat/completions endpoint into Cherry Studio. If your Cherry Studio version expects a root address and appends /v1/chat/completions automatically, use https://router.flatkey.ai and rerun the check.
Where do I get the Cherry Studio API key for Flatkey?
Use a Flatkey API key from the Flatkey dashboard. The Cherry Studio API key field should contain the Flatkey key, not an OpenAI, Anthropic, Google, or other direct provider key.
Why does my model not appear in Cherry Studio?
Cherry Studio's docs say fetched models still need to be added to the provider's model list. Add the exact Flatkey model ID with Manage or + Add, then confirm the provider is enabled.
Can one Flatkey key use multiple Cherry Studio models?
Yes, if those model IDs are available to your Flatkey account and configured in Cherry Studio. For cleaner logs, teams should still consider separate keys by user or environment.
Should I add multiple Flatkey keys separated by commas?
Cherry Studio documents comma-separated multi-key polling for provider keys. For Flatkey, start with one key so your first Cherry Studio API check is easier to debug. Add multiple keys only if your team has a deliberate key rotation or usage-separation reason.
Final Check
Your Cherry Studio API setup through Flatkey is ready when these checks pass:
- The provider is named clearly, such as
Flatkey. - Provider Type is
OpenAI. - The API Key field contains a valid Flatkey key.
- The API Address points at the Flatkey router base URL.
- At least one valid Flatkey model ID is added.
- Cherry Studio's check succeeds.
- The provider switch is enabled.
- A small test prompt appears in Flatkey usage logs.
Get a key to connect Cherry Studio to Flatkey, then use View Pricing to choose the model IDs you want in your Cherry Studio model list.